Suppose a user wants to make sure that the voltage installation is precisely a specific voltage that is required. In that case, an expert opinion is quite advised. They will investigate the surroundings and estimate the special masses that your facility or assignment needs in addition to different elements to fix the voltage.
When it comes to voltage adjusting, the same guidelines are applicable. Changing high voltage generators, such as 4,160 or 13,500 Volt, is challenging. Moving from 600V to 480V is more accessible but going the opposite way is difficult. Moreover, certain components on 3-phase generators are difficult to operate, and even navigating them is challenging. It is better to ask for help from an electrician or a professional generator mechanic for such complicated matters. But if you’re still looking to do it on your own, we’re here to give you the complete guide to achieve the task at hand.
Adjusting the Voltage
 While most generators enable you to alter the voltage, the choices you have can still be restricted as it depends on the type of generator you have. However, changing voltage is still a difficult task, and a technical electrical technique is required that mostly entails modifying the generator leads. To solve this, new commercial generators now contain a voltage regulator built in most of their control panels. This feature now allows the users to change the voltage settings and make it do the regulating itself. While this development is quite positive, the additional feature of voltage regulators makes the board replacement even more expensive.
There are two ways to adjust the voltage: manually or by an Automatic Voltage Regulator (or AVR). Follow these simple steps to adjust your voltage manually:
Step 1: Locating and Adjusting Voltage Dial
On the portable generator, there is a voltage dial. It is usually present on the right or left side of the generator. After locating the dial, the output is also displayed near it in voltage. Adjust the dial according to the voltage required. However, not all generators come with this feature.
Step 2: Adjusting RPMs
To increase or decrease the RPMs of the generator’s motor, adjust the throttle of the machine. The slower the RPMs, the lesser the voltage output, and the higher the RPMs, the more the voltage output. Located on top or side, the throttle has RPM written on it. However, read the owner manual beforehand to make sure the generator can efficiently run for the desired period at lower RPMs.
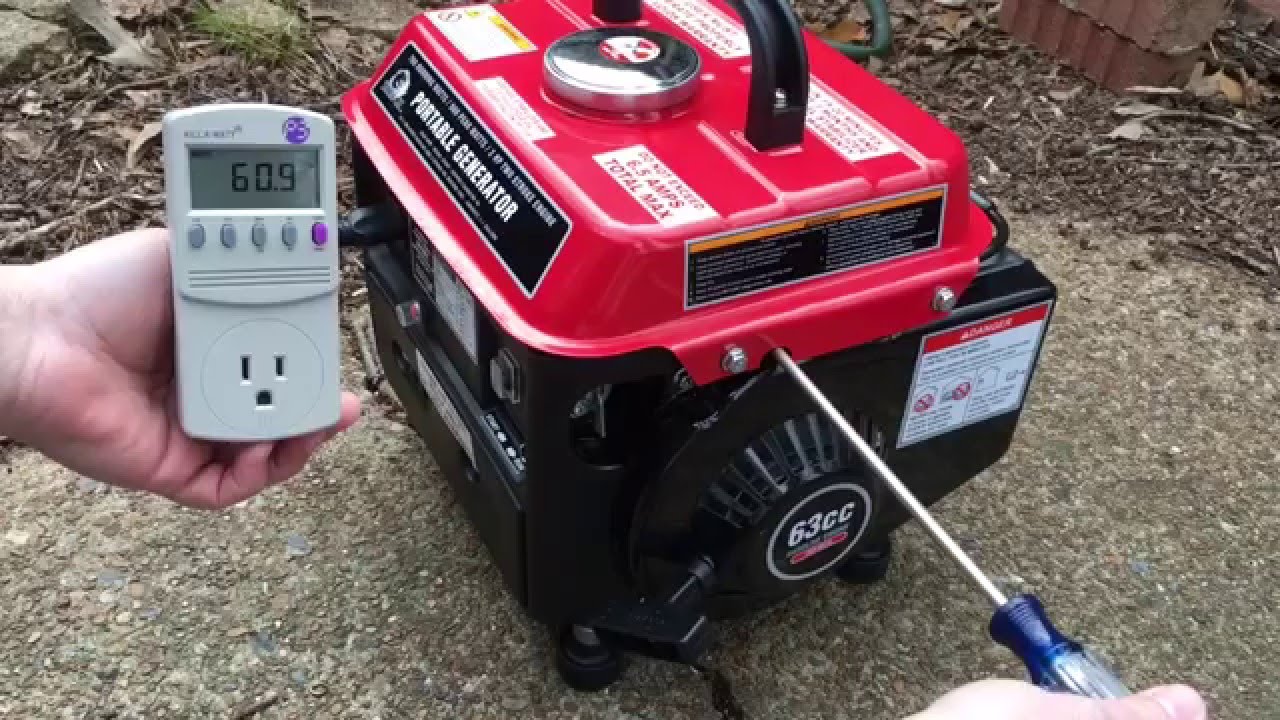
Step 3: Verify the Voltage Output
Use a voltmeter to verify the voltage output. Whenever adjusting the voltage output, even if the generator has a voltage dial, it is better to use a voltmeter. The voltmeter ensures that the generator is producing the desired voltage and verifies it before plugging in equipment. It is done by connecting the voltmeter to the generator output where the equipment is plugged in.
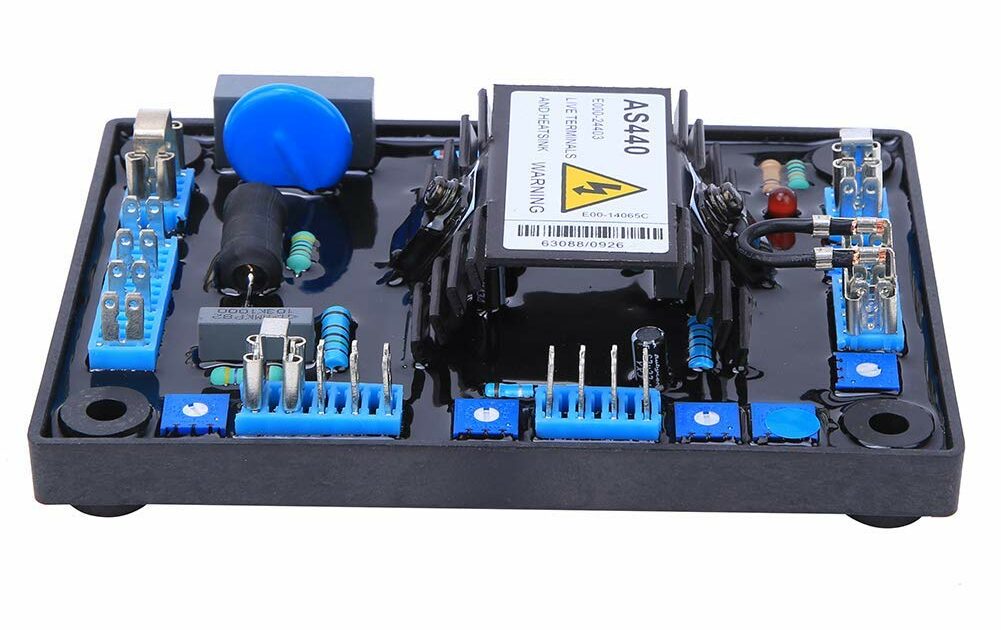
Adjusting Automatic Voltage Regulator (or AVR)
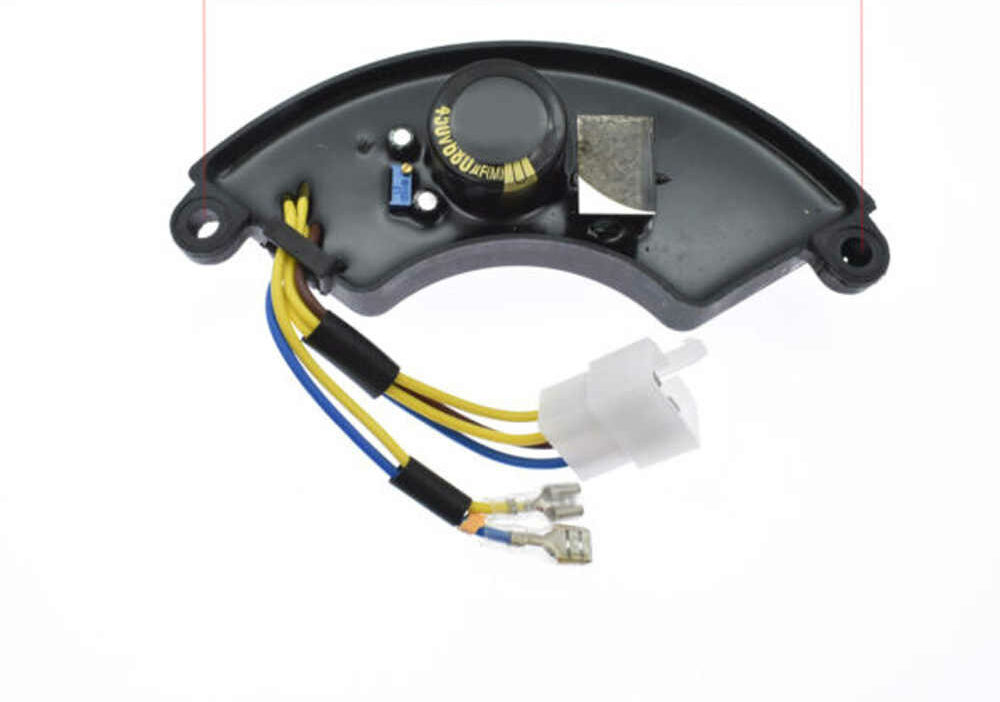 AVR (Automatic Voltage Regulator) is a system used to adjust the voltage. It is a control device that is also the brains behind the machines, such as power stabilizers and power conditioners. Generally, an automatic voltage regulator is a system that automatically regulates the voltage. If it fluctuates, it keeps the generator at a constant level.
The main aim of the automatic voltage regulator is to prevent the generator voltage from getting too high and burning out the electrical equipment or overcharging the generator’s battery. It does this by automatically adjusting the generator’s voltage as the spinning speed of the generator increases. Moreover, the voltage regulator adjusts the generator’s output by keeping it constant and stops it from falling too much. A fall in voltage can cause electrical devices to fail.
Operation and Maintenance Of AVR
 The regulator is mostly not allowed to get rid of the cover throughout the operation. Typically, comprehensive maintenance is performed after every two hundred hours of operation. The contents are as follows.
- Take away the cover and check the contact surface for dirt and burning loss. If there is dirt, wipe the contact surface with clean paper. If the contact is ablative or the character isn’t flat, which causes poor contact. Use “00” sandpaper or sand strip to grind it and clean it with clean paper.
- Check the fastness of each connector. Calculate the resistance and resistance value of every coil. In case of any damage, repair or replace new ones in time.
- Check the closing voltage and reverse current of this interrupter, the limiting voltage, and therefore the limiting current of the throttle. Check the gap and air gap of varied contacts. If it doesn’t meet the requirements, it ought to be adjusted.
- Check the set regulator and pay attention to the pointer display of the load ammeter when starting the diesel engine. Suppose the pointer of the ammeter continues to point to the “-” side. Moreover, suppose at the medium speed of the diesel engine, it indicates that the circuit breaker contact is not disconnected. In that case, the earthing switch should disconnect quickly. Otherwise, the battery, regulator and charging generator will be damaged. Suppose the ammeter pointer still shows “0” after starting the diesel engine at nominal speed. In that case, this indicates that the setting does not meet technical requirements and should be checked and set again.
Complications
While connecting the leads to a voltage, a voltage regulator often requires the users to change the sensing wires that run to the control panel. Therefore, the users should be careful when handling these wires. There is a risk of burning out the board or injurin yourself if not done correctly. Specifying the electrical phenomenon for this kind of switch is crucial. An ATS is vital for guaranteeing that the generator can mechanically take over when there is a utility blackout and shut down automatically once the electricity is restored.
Safety Precautions
To minimize the risk of injury, always read the operator’s manual and understand it correctly. Before making any changes to the generator, make sure its motor has stopped entirely. Disconnect the spark plug wire before making any changes in the generator. Always allow the generator to cool down completely before touching it to avoid getting skin burns. It is crucial to keep any fuel-related components free from sparks, fire, or cigarettes. Always remember you are dealing with a fire hazard, so be prepared accordingly.
Conclusion
When it comes to adjusting voltages on a generator, we can say that this isn’t a task that anyone can do. It’s complicated and if you’re not careful, you could be putting your machinery and even yourself at risk. If you feel like you don’t have the technical knowledge to adjust the voltage yourself, we highly recommend getting a professional to do it for you.