From not upsetting the neighbors to helping you sleep better, there are several reasons why you should consider reducing noise from your generator. Making a DIY quiet box is an easy and inexpensive way to ensure this. Thus, in this article, you will find how to build your generator quiet box independently. But what materials should you have before you embark on this project? Here is how to build a generator quiet box in seven easy steps.
Materials Needed
 Not just any box would fit as a noise-reducing box for your generator. For this reason, using the most efficient materials is of great importance. What do you need to build an efficient generator quiet box?
- MDF – For the frame of the quiet box, you need a medium-density fiberboard (MDF). To be specific, you need MDF for exteriors, also known as MDX.
- MLV – The Mass Loaded Vinyl is the suitable material for the first soundproof layer.
- Foam Mats – These will function as an extra layer for soundproofing.
- Acoustic Caulk – Any caulking material might do. But for several reasons, many users prefer green glue.
- Vents and Venting Ducts – Required for proper aeration of the generator.
Now, here is how to build a generator quiet box with these materials with the following steps.
Step 1 – Take Measurements
Before you can do anything, you need accurate measurements of the generator. To avoid wastage of materials, ensure that there is enough allowance for every soundproofing layer and vent. For accuracy, you can take the measurements as many times as possible.
Step 2 – Measure and Cut the Box Accordingly
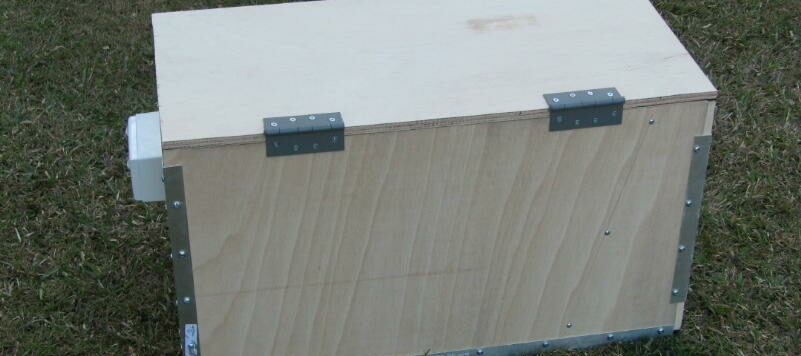
Now that you have accurate measurements, you need to cut out the unwanted box’s sides. MDF is preferable to plywood for soundproofing. Get your medium-density exterior MDF and cut according to the dimensions you are working with. You can do this using any saw available to you. For the quiet box, you will need four sides and a top piece, so label accordingly.
Step 3 – Create Holes for Venting Ducts
To ensure your generator does not overheat, it needs ducts for proper aeration. Although these ducts will be attached later, you need to make holes for them on the MDX now. First, measure the width of the duct and mark the MDX like this:
- One on the covering piece of the quiet box, preferably to the side; and
- The second should be on any of the walls of the quiet box. This hole should be opposite the hole on the covering piece of the set-up.
Step 4 – Caulk the First Layer of Soundproof Material
For our quiet box’s first layer, we will be using MLV, as mentioned earlier. Like every other material, you must cut according to the size of the soundproof box. After cutting, you need to glue the cut-out MLV down to the sides of the generator sound-muffling box. Getting the MLV to sit in with the edges of the quiet box is quite a challenge. Using caulk, you can get the MLV to sit snugly on every edge.
Using acoustic green glue for caulking is preferable to using any random caulk. Green Glue yields better results because it doubles as a soundproof material. It dampens sound by converting it to heat energy.
Step 5 – Add Another Layer
We will not be using MLV for this layer. Instead, we will be using foam mats. The components and texture of a foam mat could be exactly what your generator needs to reduce noise. This layer reduces noise by absorbing some percentage of the sound the generator produces. Following the dimensions of the generator quiet box, cut out the layer of the measured foam mat. Like we did with the MLV, glue the foam mats to the first layer and caulk the edges.
Step 6 – Assemble the Parts of the Box
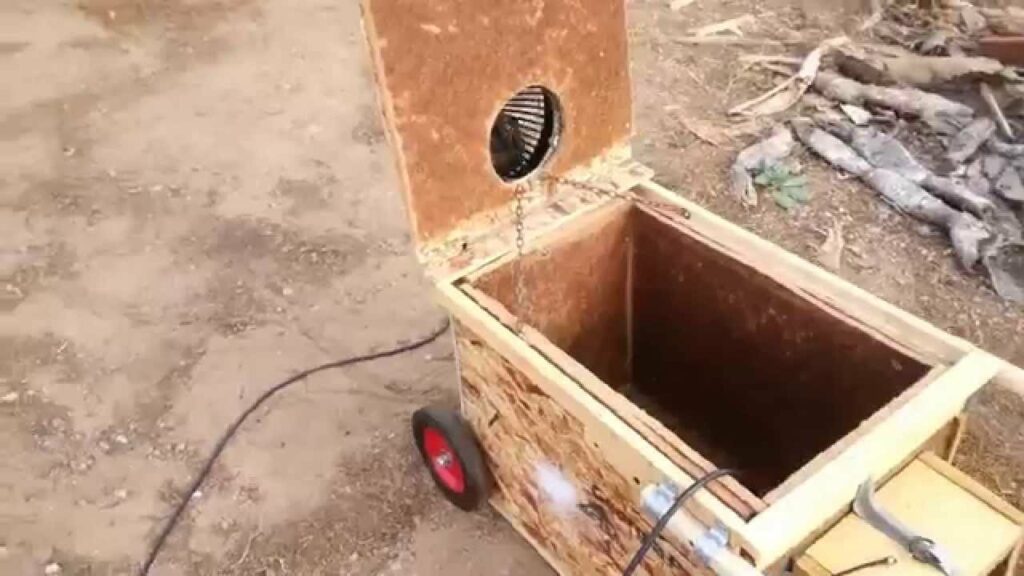 Here is where your drill, hammer/screwdriver, and screws/nails come in handy. After letting the green glue dry, bring all five sides of the noise-reducing box together. As labeled, put the four walls together first using nails or screws. Screws are more advisable as they make it easier to disassemble the soundproof box. Finally, screw the top piece onto the set-up.
Step 7 – Install the Ducts for Ventilation
Now is the time to put those holes you made on the MDX in step 3 to use. While keeping the noise from your generator at bay, you equally need to let out the heat it produces. The more bends and length your ventilation ducts have, the better. Ensure to tighten the ducts to keep them in place. After this, place a vent over the ducts, and your generator muffling box is complete.
Things to Consider When Choosing a Design
Taking a blind approach when deciding on a design for a quiet box might not yield the desired result. Hence, the need to make sure that you are building right. So, here is how to build a generator quiet box with great design. Important points to consider choosing the best design for you includes:
Fuel Type
The type of fuel that powers your generator influences the quiet box design you need because certain fuel types produce more heat than others. For instance, gas, propane, and diesel-powered generators require more air circulation than others.
Due to the air-circulation requirement, generators powered by these fuel types require quiet boxes with more air vents than usual.
Storage Mode
In designing the structure of your quiet box, considering how long it will be in use is essential. If you do not need the generator noise-reducing box over a long period, consider a collapsible design for easy storage. If using the generator involves some form of movement, your quiet box’s design should readily accommodate it.
Weatherproof
Depending on your region’s climate, you might want to make your quiet box’s design resistant to weather. You can do this by fastening a screen, preferably metal- over the vent.
Budget
Your budget will play an integral role in what design you can adopt in making a generator quiet box. If you want a hinged design, prepare to spend a large chunk from your pocket. These designs are more expensive than the budget-friendly wear-on.
Generator Startup
When picking a design, it is also worth considering the mode with which you power your generator. For instance, a key start generator requires a design that grants you access to the key. A pull generator will use a unique design to accommodate the manual pull area.
Power-Outlet Positioning
Another point to consider is the positioning of your generator’s power outlet. As not all designs will fit, you must take the power outlet’s size and position on the generator into account.
Wrapping Up
As generators work, they generate not just power but sound. Here, we considered how to build a generator quiet box and the equipment needed to minimize the noise. Also, we looked at several key factors to help you settle on a design for the best result.
Before you undertake your project, endeavor to consider factors such as the type of generator you are building the quiet box for, whether or not it would be mobile, the method of starting the generator, and of course, your budget. That way, you can build a quiet box that suits your generator, is effective, and is worth your DIY efforts.