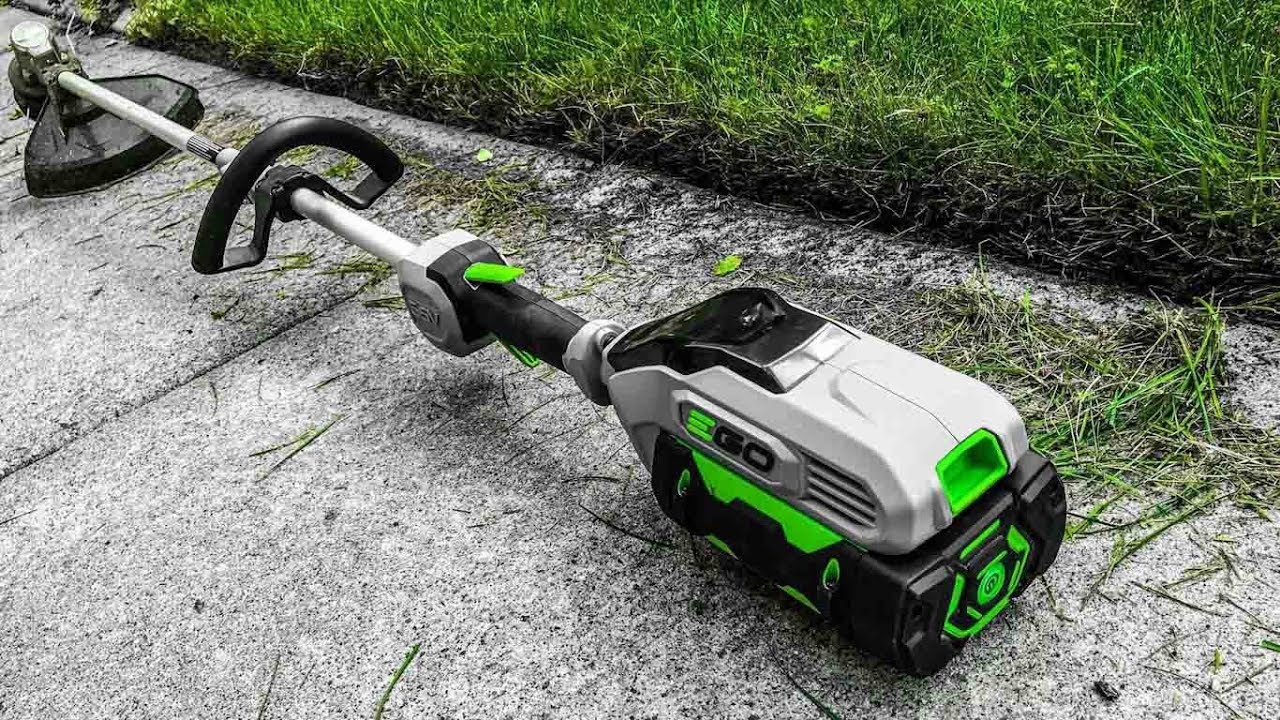
Ego string trimmers are a gem for upkeeping lawns and courtyards. They are efficient tools that play a significant role in the beautification of your backyards. Ego trimmers are famous for durability and performance.
However, that does not change the fact that the spool of the trimmer might never need replacement. Slashing through relentless weed can make the spool go brittle. Changing the spool of your Ego string trimmer can help improve its functioning and save you time.
So, how do you change the Ego string trimmer? Well, that’s pretty easy. If you find the process to be painstaking, we have the right solution for you. This detailed guide will assist you throughout the process.
Steps to Change Ego String Trimmer
Let’s take the process of changing the Ego string trimmer step-by-step!
Step 1: Remove the Trimmer’s Battery
 When you are changing the spool of your Ego string timmer, you must also take safety precautions. Your first and foremost safety step should be removing the battery. Removing the battery before starting with the process will avoid an accidental start.
Also, take some time to clean the battery. Many a time, a dusty trimmer battery can hamper the performance of your Ego string trimmer.
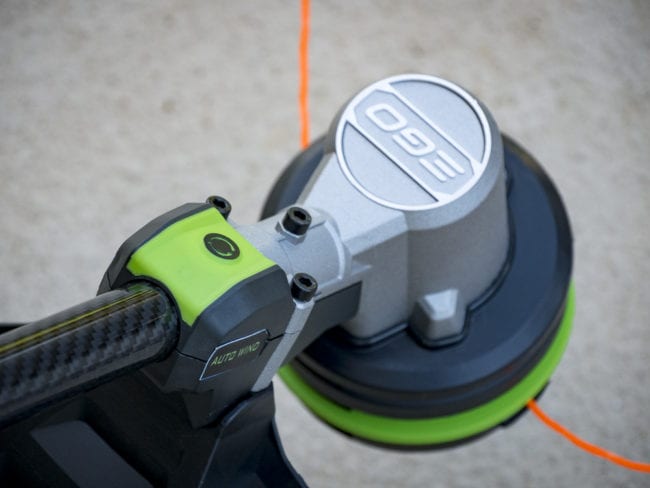
Step 2: Empty the Spool
The second step in the process is to empty the spool. You would want to open the spool compartment for changing the string. The Ego string trimmers have a release button for the spool retainer.
After pressing the tabs, you can straight away pull and remove the old string. Moreover, it’s an excellent opportunity to clean the inner portion of the spool compartment. Additionally, also check the area for any signs of wear and tear.
Step 3: Cutting & Winding the Spool
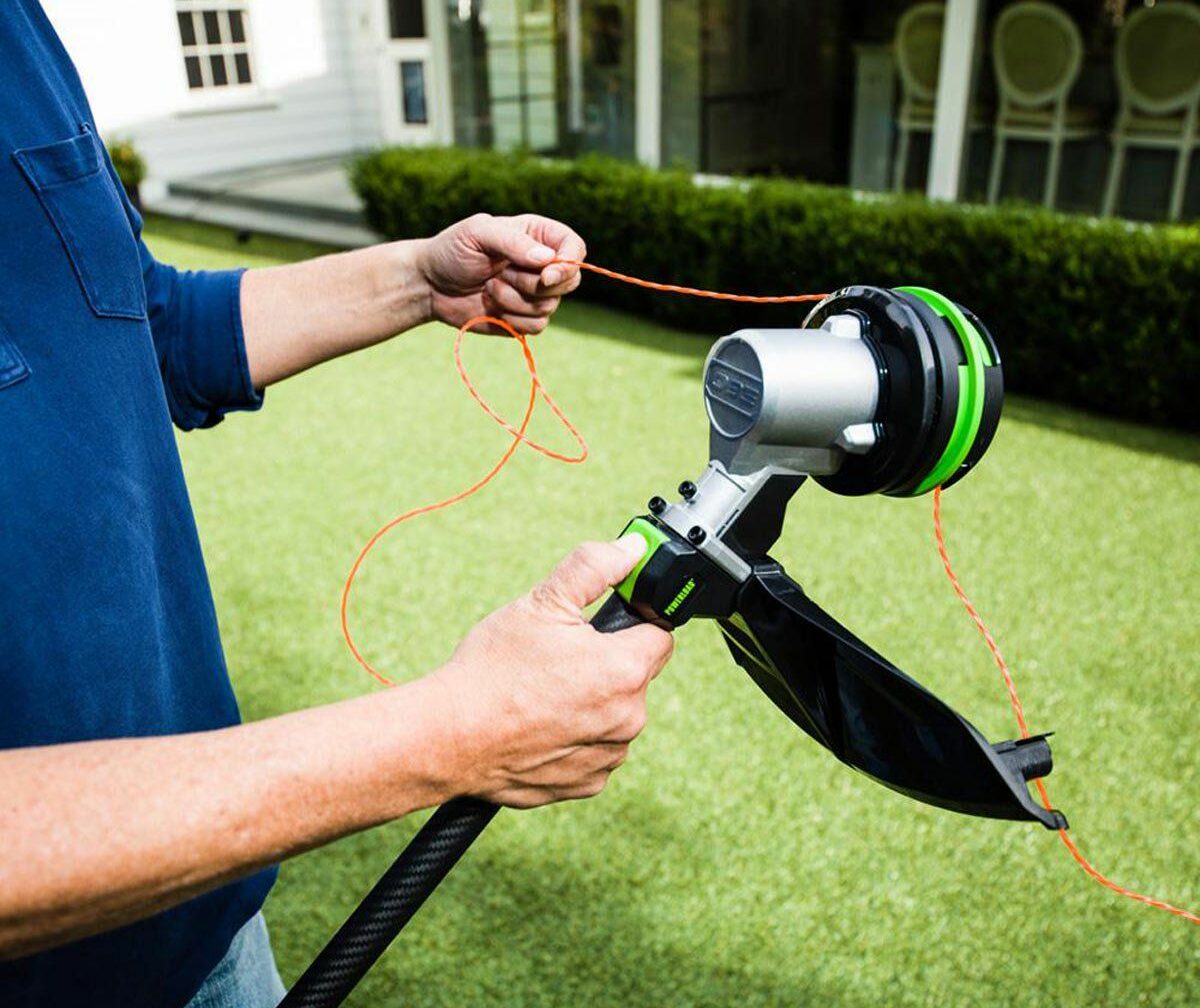 The thing is that different models have different string requirements. Typically, the appropriate length for the Ego string trimmer is 16 feet to 18 feet. Cut about 18 feet of strong, and fold it in half.
Also, there is a lot of confusion about the ideal string thickness for Ego string trimmer models. Let us make it clear that it should have a 0.096-inch diameter. Besides, the string should be able to twist itself.
Also, you should extend one of the sides of the thread by a few inches more. After all this, you can start winding it. It would help if you looked for arrows indicating the direction for winding and then start with the process.
Step 4: Place the Strings
After winding, it’s time to set the strings in the opposite spool notches. On an important note, don’t incorporate the line completely, and leave a few inches. Make sure to align the spool’s notches with the eyelets of the retainer.
Next, you have to check if the spring is adjusted correctly on the spool base or not. The spring should not be lose.
Step 6: Fix the Spool Base
After checking the spring’s position, it’s time to fix the spool base. You have to set the spool base, and it should be facing downwards. You also have to align the slots with the one in the spool retainer.
Once you ensure proper alignment, all you have to do is press down the retainer. This step will evenly fix everything to its original position.
When you have successfully changed the strings and fixed the retainer, you can plug the battery back to place.
Step 8: Test the Ego Trimmer
Now is the time where you’ll understand if you’ve got the process right or wrong. After carrying out all the seven steps above, you have to test the unit. Also, you can do some cutting if the trimmer is not working as expected.
In case the trimmer fails to work correctly, you can check out the spring location.
Final Thoughts
With the Ego string trimmer, maintaining your lawn is going to be an effortless task. The tool is lightweight and user-friendly. However, it would help if you replaced an old & brittle string for the sake of efficiency.
If you give the guide a good read and follow it thoroughly, you will not go wrong. Hopefully, now you have everything you had to know on how to change the Ego string trimmer. Don’t waste more time, and put on your gloves for some gardening time!