The Ryobi’s string trimmer line is the next best alternative to a goat when dealing with ruthless lawns. Lawns look shabby with all that weed growth, and it’s better to trim them from time to time.
String trimmers have an enormous appetite for new string while they’re chewing through the weeds. If this is your first time tackling the loading job for your Ryobi string trimmer, don’t fret. Once you are familiar with the procedure, it’s an easy peasy task.
The best thing about some Ryobi string trimmer models is that you don’t have to remove the knob for loading. So, are you ready to learn how to load Ryobi string timmer? Let’s get started!
A Step-by-Step Guide to Load Ryobi String Trimmer
In this section, you’ll have a step-by-step guide on how to load a Ryobi string trimmer. Once you go through this guide, you’ll be able to load a Ryobi string trimmer in no time. Each step has clear and in-depth details for your convenience.
Step 1: Choosing the Appropriate Line
 Each Ryobi trimmer has different string requirements. The best way to understand the ideal string attributes is to refer to the user manual. Moreover, you don’t want to be overloading your trimmer with an extra-thick and extra-long line.
The diameter of the string should complement the engine size and the tool’s capability. However, that doesn’t mean you have limited options. There are multiple sizes of trimmer lines that will fit your Ryobi string trimmers.
In case you have heavier, thicker weeds, you can opt for a serrated line. Here are all the lines available:
- Multi-sided line
- Braided line
- Standard round line
Step 2: Disassembling the Trimmer Head
Once you have the ideal string in your hand, it’s time to get to the actual process. The next step in the process is disassembling the trimmer head. You can remove the trimmer head by unscrewing the trimmer’s bump knob.
Now, pull the old line out and discard it. It’s also an excellent opportunity to clean out the dirt and debris inside the trimmer head.
On that note, you must know that in some of the Ryobi tools, you don’t have to go through this step. Some of the Ryobi string trimmers allow the user to load without removing the knob.
Step 3: Inserting the Line
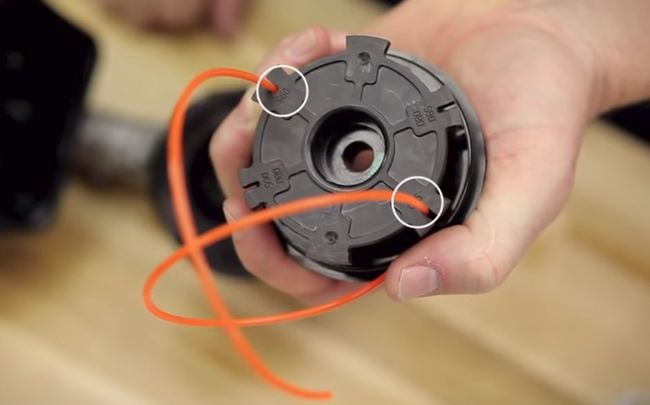
It’s time to insert a new line in the Ryobi string trimmer. Cut a couple of 10 feet pieces of string and double them up. Insert these lines inside one of the reel’s holes. Then, you have to pull it in towards the spool till only a few inches are remaining.
Grab the remaining line, and insert it inside the other hole of the reel. You have to pull the string tight to close the loop. This step will ensure that the line is aligned and doesn’t spin loose inside the trimmer.
Step 4: Wrapping the Line Onto the Trimmer Reel
 You have to wrap the string towards the direction of the arrow on your Ryobi trimmer’s reel. You’ll notice that there’s a small arrow that is embossed on the head of the trimmer. The arrow’s location in each Ryobi trimmer is mostly the same.
You have to add enough pressure so that the line even wraps itself. It would be best if you weren’t leaving too much slack. Otherwise, the line will feed poorly. When there are about six inches of string left, push them inside the holding slots.
Step 5: Reinserting the Spring & Feeding the Line
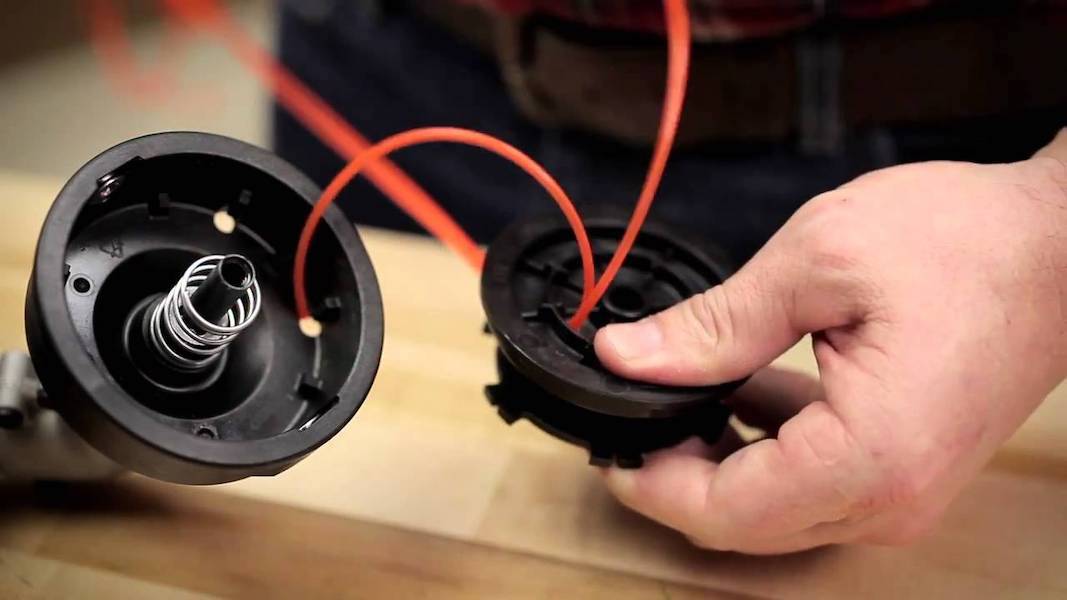
You have to reinsert the trimmer’s spring onto the shaft like it was before. Hold the spring firmly downwards to prevent it from shifting or moving out. Spot the eyelets on the spring’s head.
While you’re equipping one hand to position the spring, use the other hand to push the line through the eyelets. Pull the string firmly, and continue holding the reel’s spring as you perform the next step.
Step 6: Closing the Head Tightly
In this step, you have to return the reel to its primary position. The original position of the reel is one the shaft. You have to line the holding slots with the eyelets.
Next, hold the reel downwards, compress the spring, and put the knob back to the trimmer head. You have to screw the knob on the trimmer head tightly.
Step 7: Pull the Line Out
Don’t pull the line too hard. You can effortlessly pull it out and ensure that the holding slots have released them. Once you place the line correctly, you’re ready to go back to the lawn. Start the trimmer up, and give it a couple of spins to check it.
Now that the line is all loaded and new, nothing will stop you from trimming those pesky weeds!
Wrap Up
If you want to get the best results, make sure you have the correct thickness and length of the string. You might have to cut the line approximately 15 to 25 feet in length. An incorrect line can lead to the engine wearing out quicker.
It is ideal for checking the user manual for this purpose. You may also cut the string length after loading the Ryobi string trimmer. After loading the spool and checking the alignment, you can get back to lawn work.
Your trimmer is now ready to tackle all the lawn chores like a pro!
