Connecting a generator to a breaker box is not as complicated as it sounds; with a few simple steps, you can help yourself out of power cuts while at the same time protecting your equipment.
We’ve put up a list of all of the equipment and instructions you’ll need to connect your generator to a breaker box yourself. Let’s get started!
To accomplish the task, first determine what kind of generator you’re working with. Then find out the amperage and plug type of your generator’s power system so that you can plan for the appropriate devices you’ll need.
Determining the Power of the Generator
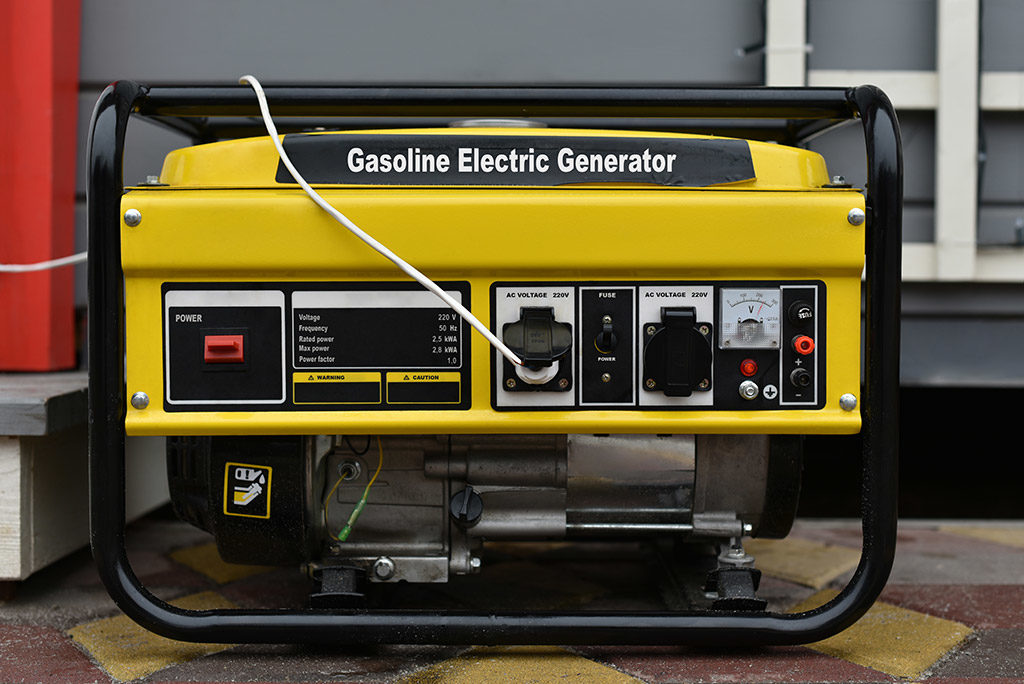 The generator’s label is where you’ll find out the wattage or amp draw. The second method is to check the plug closely, as the amperage is inscribed on the plug mostly.
Check the wattage and amperage of the generator and make a note. The generator’s wattage will help you determine if the generator can run your appliances or not. It also helps to select the size of your household circuit breakers.
Materials Required to Connect Generator to the Box
Below is the list of equipment and materials you’ll need for the job:
- Transfer switch: The transfer switch breaks and connects the circuits when you change between grid electricity and generator power. It is an optional instrument; you can work without it too.
- Breaker interlock kit: If the transfer switch is not available, you can use the interlock kit. It gets plugged in between the generator’s plug and the home’s breaker panel.
- Double pole breakers: Make sure you have the same amperage breaker as your generator.
- Power inlet box: This acts somewhat like a junction box. It connects the generator’s power inlet with your home system main panel.
- Heavy-duty wire: You’ll need a thick wire for connecting the generator to the power inlet box. The size is determined by checking your appliance’s manual.
- Fuses: The fuses installed on your circuit breaker panel must match the amperage rating of your generator.
- Conduit body: A cover body protects the wiring from weather elements.
- Conduit glue: Glue is used to secure the conduit body to the electrical box.
- Extension cords: You’ll need one cord for supplying power to the interlock kit.
- Electrician’s pliers & wire strippers: These are essential tools that help you prepare the wire perfectly before connecting them with plugs and sockets.
Step by Step Guide to Wire a Generator to Breaker Box
Below we have put together a step-by-step tutorial for wiring a generator to a breaker box. It is divided into six steps to make the process easy for you.
Step # 1: Drill Access Hole in Your Exterior Wall
An access hole is required since you’ll need it to pass the wires through the generator outside to your house’s electrical system. You can make this hole with a hammer drill, a power drill, or an auger. Check your local electrical code for details on how to drill the hole. Be careful to drill this hole closer to the main switch.
Step # 2: Set Up Your Power Inlet Box to the Wall
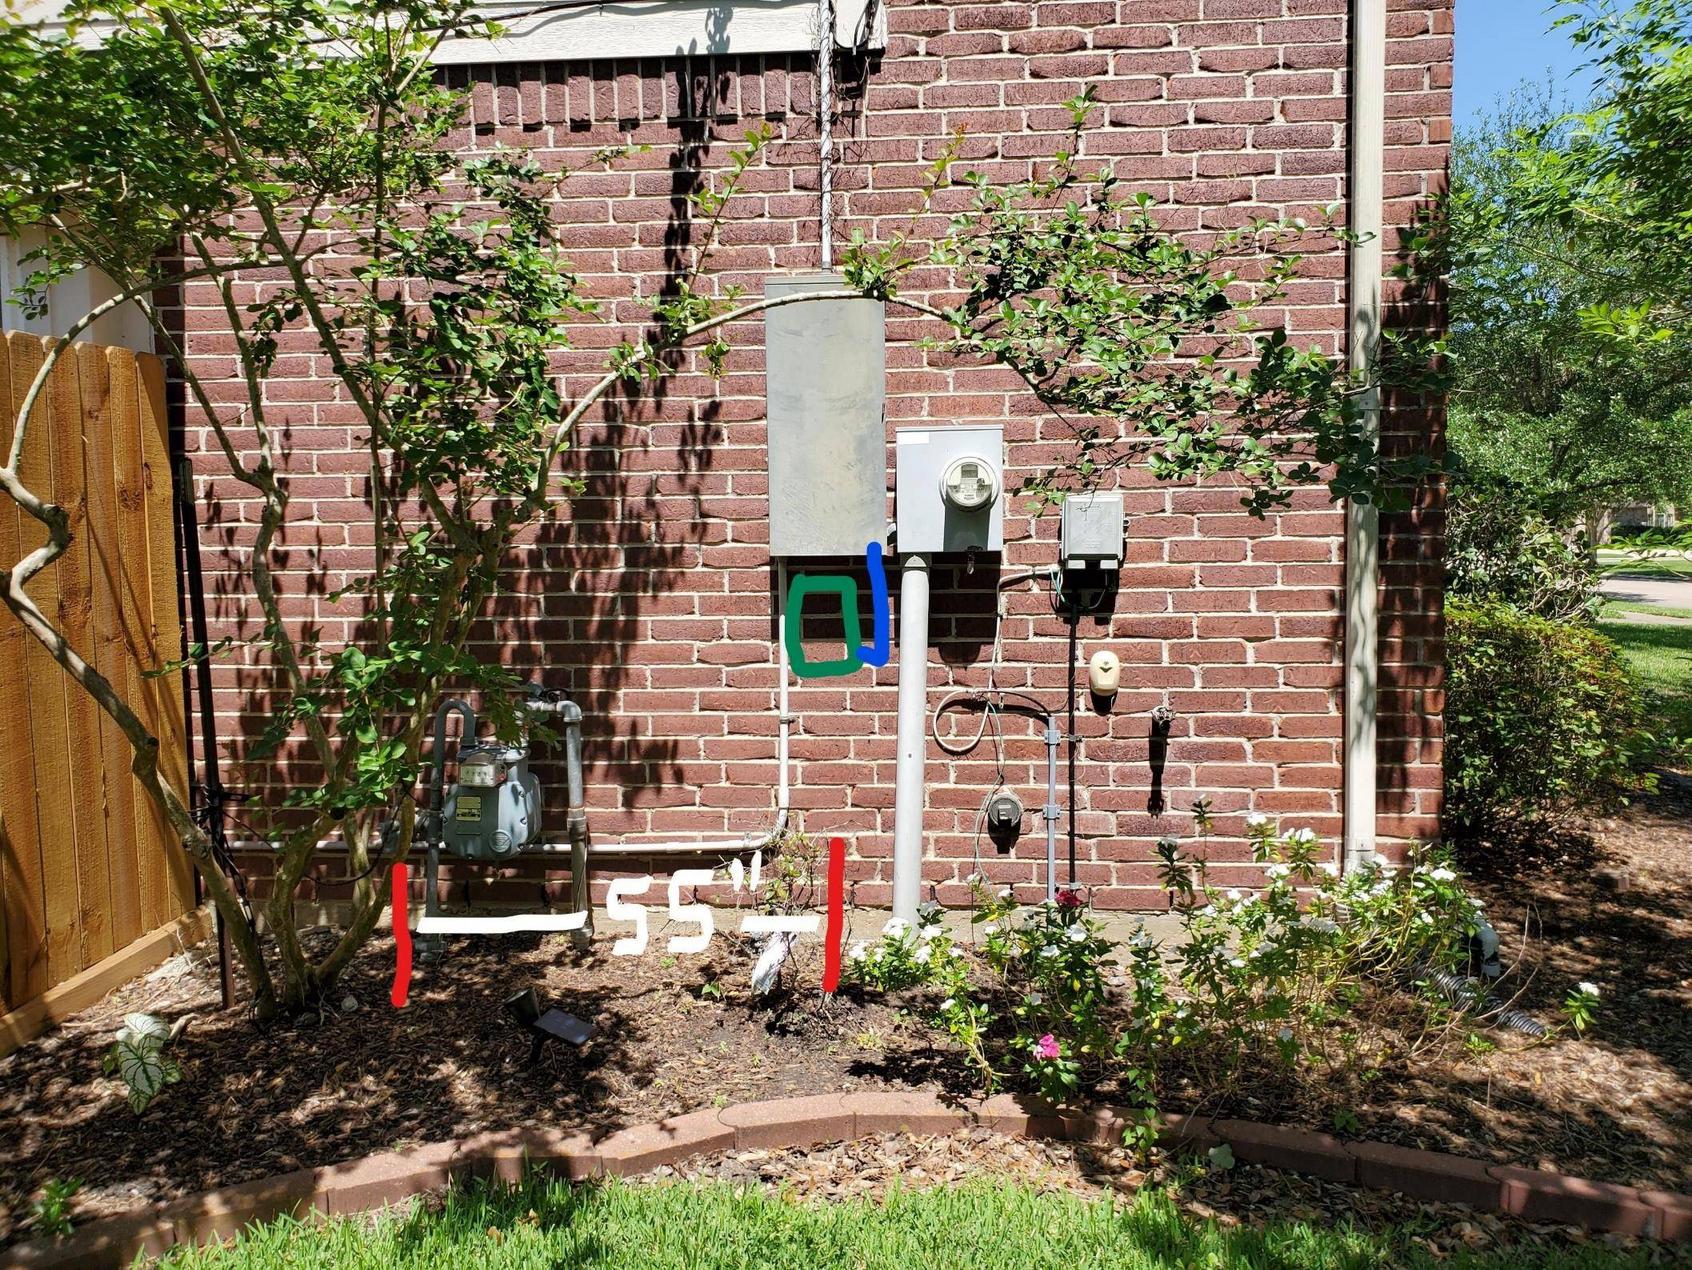 Unscrew the front cover of the power inlet box, then fix the box on the wall with the help of screws and drill. You’ll need at least 3 to 4 holes to fit the power inlet box. Conduit glue is used along screws to secure the box from environmental elements.
Step # 3: Attaching the Conduit Tube to the Inlet Box and the Access Hole
Now, pass the wire through the conduit body and place the conduit tube between the inlet box and the access hole with no space in between. Seal the body with the help of conduit glue, taking care to cover all gaps. Leave the glue to dry for a few minutes for firming the seal.
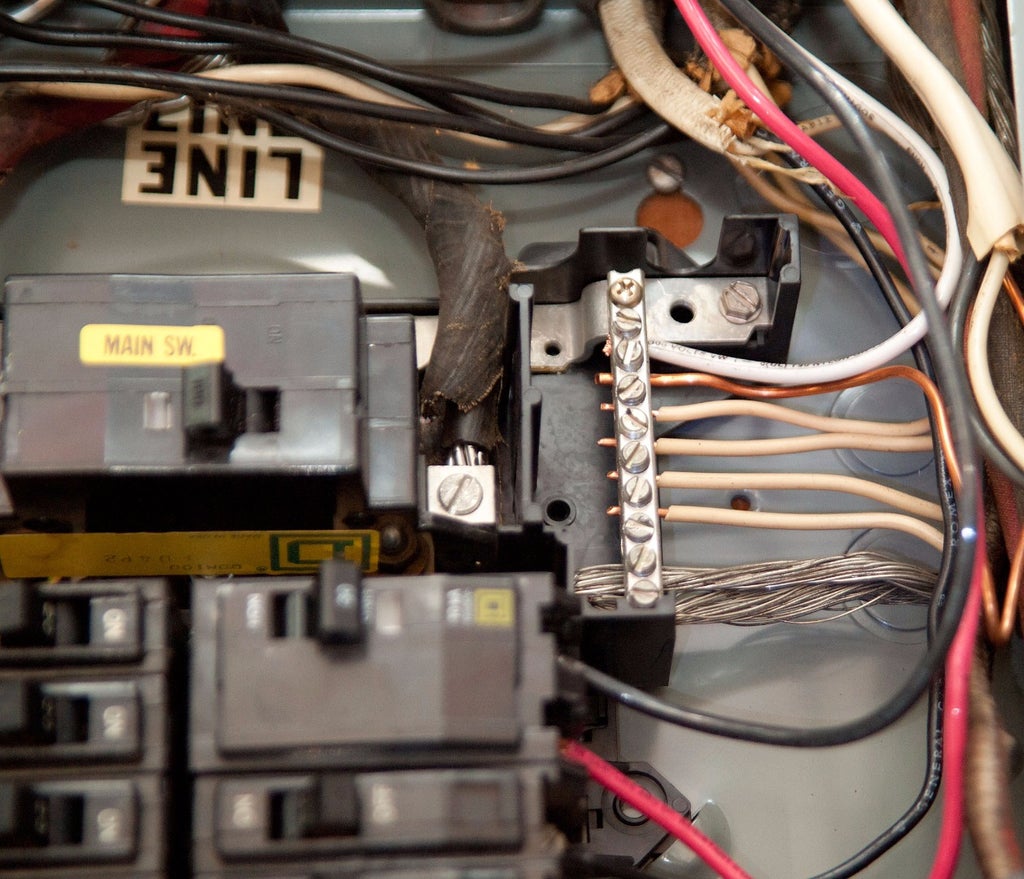
Step # 4: Wire Up the Generator Inlet Plug
Once the glue is completely dry, it’s time to connect your transfer switch with the power inlet box. Make sure that the power supply to the transfer switch is turned off.
Remove the cover from the main power box and then pull each wire one at a time out of the conduit. Remove an inch or two of insulation from the end of each wire. Make sure you do not damage the wires’ colored coating.
Attach one stripped cable to each terminal, twisting them clockwise with a pair of pliers for tightening.
- Remember that the green wire is the ground wire and should be attached to the main inlet box.
- The white wire should be connected to the W terminal since it is a shared wire.
- The black and red wires must be linked to the X and Y terminals, respectively.
Once you’ve completed the preceding procedures, pull each wire out of the conduit tube one at a time into the house and replace the cover. Make sure there isn’t a space between the wall and the conduit tube; if there is, use conduit glue or silicon to fill it.
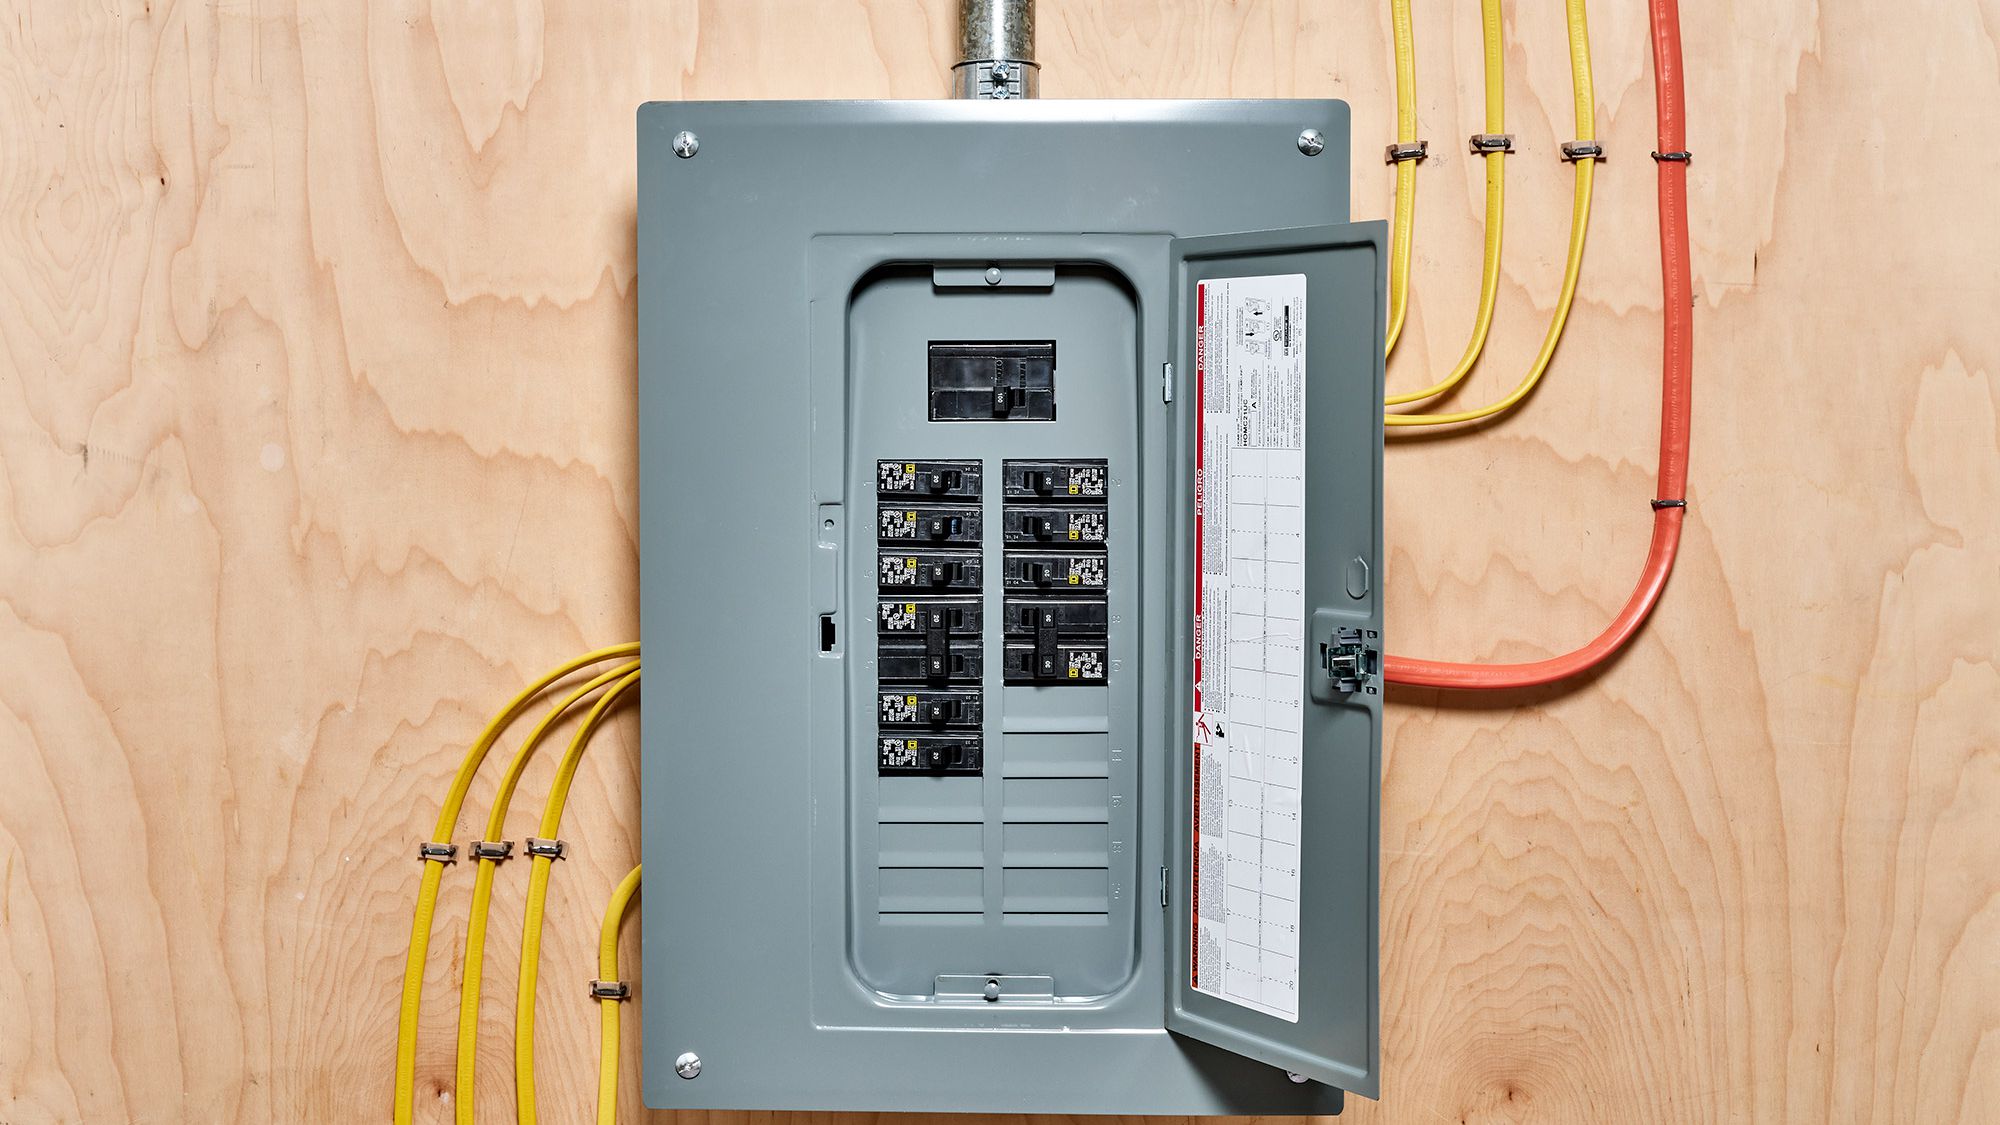
Step # 5: Make the Circuit Breaker Box Ready for Power Wires
Turn off all the circuit breakers; turning off the main breaker would be a better choice. Now open the four screws of the front panel of the circuit box and then remove the knockout panel parts to screw in the conduit adaptor. Make sure the conduit adapter fits properly.
After doing this, pull out the wires from the conduit into the breaker itself. But if you are using an interlock, you will need some extra space in the upper right corner of your breaker panel.
For this purpose, you will need to shift one or two breakers from the main panel; if there is not enough wire inside it, then you can use a small piece of insulated wire as an extension cord.
Step # 6: Installing Wires and the Generator Power Breaker
 Once you have made space for the generator power breaker at the upper right corner, make sure to connect the red wire to one terminal and the black wire to the other terminal of the breaker.
Then connect the common white wire to the common rail in the breaker box. Next comes the green wire; it is the ground wire. Make sure to attach this wire to the matching ground rail.
You will need a retaining bracket to make sure that the breaker does not come loose. After fixing the bracket, place a locknut in place and then tighten it up with a wrench. This will make sure that the power breaker doesn’t come loose.
If you’ve carefully followed all of these steps then it is time to connect the main power supply. Once this connection has been made, you will be able to switch on your generator by turning on its inlet breaker.
Things to Remember:
We’ve gone through all of the procedures for wiring a generator to a breaker box; there are a few things to bear in mind while executing them:
- Make sure to use a transfer switch or a breaker interlock that fits your specific breaker box.
- Use the two poles double breaker of the same amperage as your generator, and make sure that it also fits your breaker box as they are not interchangeable.
- Fasten the wires with their respective terminals and do not tangle them. Pull each at a time to avoid regretful consequences.
By following our step-by-step guide, you should be able to safely wire your generator to a breaker box.